Do you need an easy way to make a procedural tile material for your project?
In this tutorial, I will show you how to make a procedural tile material using the shader nodes in Blender for your project.
Tile Base
Make sure you have the Node Wrangler add-on activated under Preferences
I delete the default Cube
I use SHIFT + A to add a plane and use R + X + 90 to rotate it around the X-Axis by 90-degrees
Under the Shading Workspace, I add a new material and name it
I use SHIFT + A and add a Brick Texture Node
I connect the Color output to the Base Color of the Principled Shader
I do not want any offset for the tiles so I change the Offset option to zero
I will leave the Frequencies and Squash at their defaults but feel free to explore these options
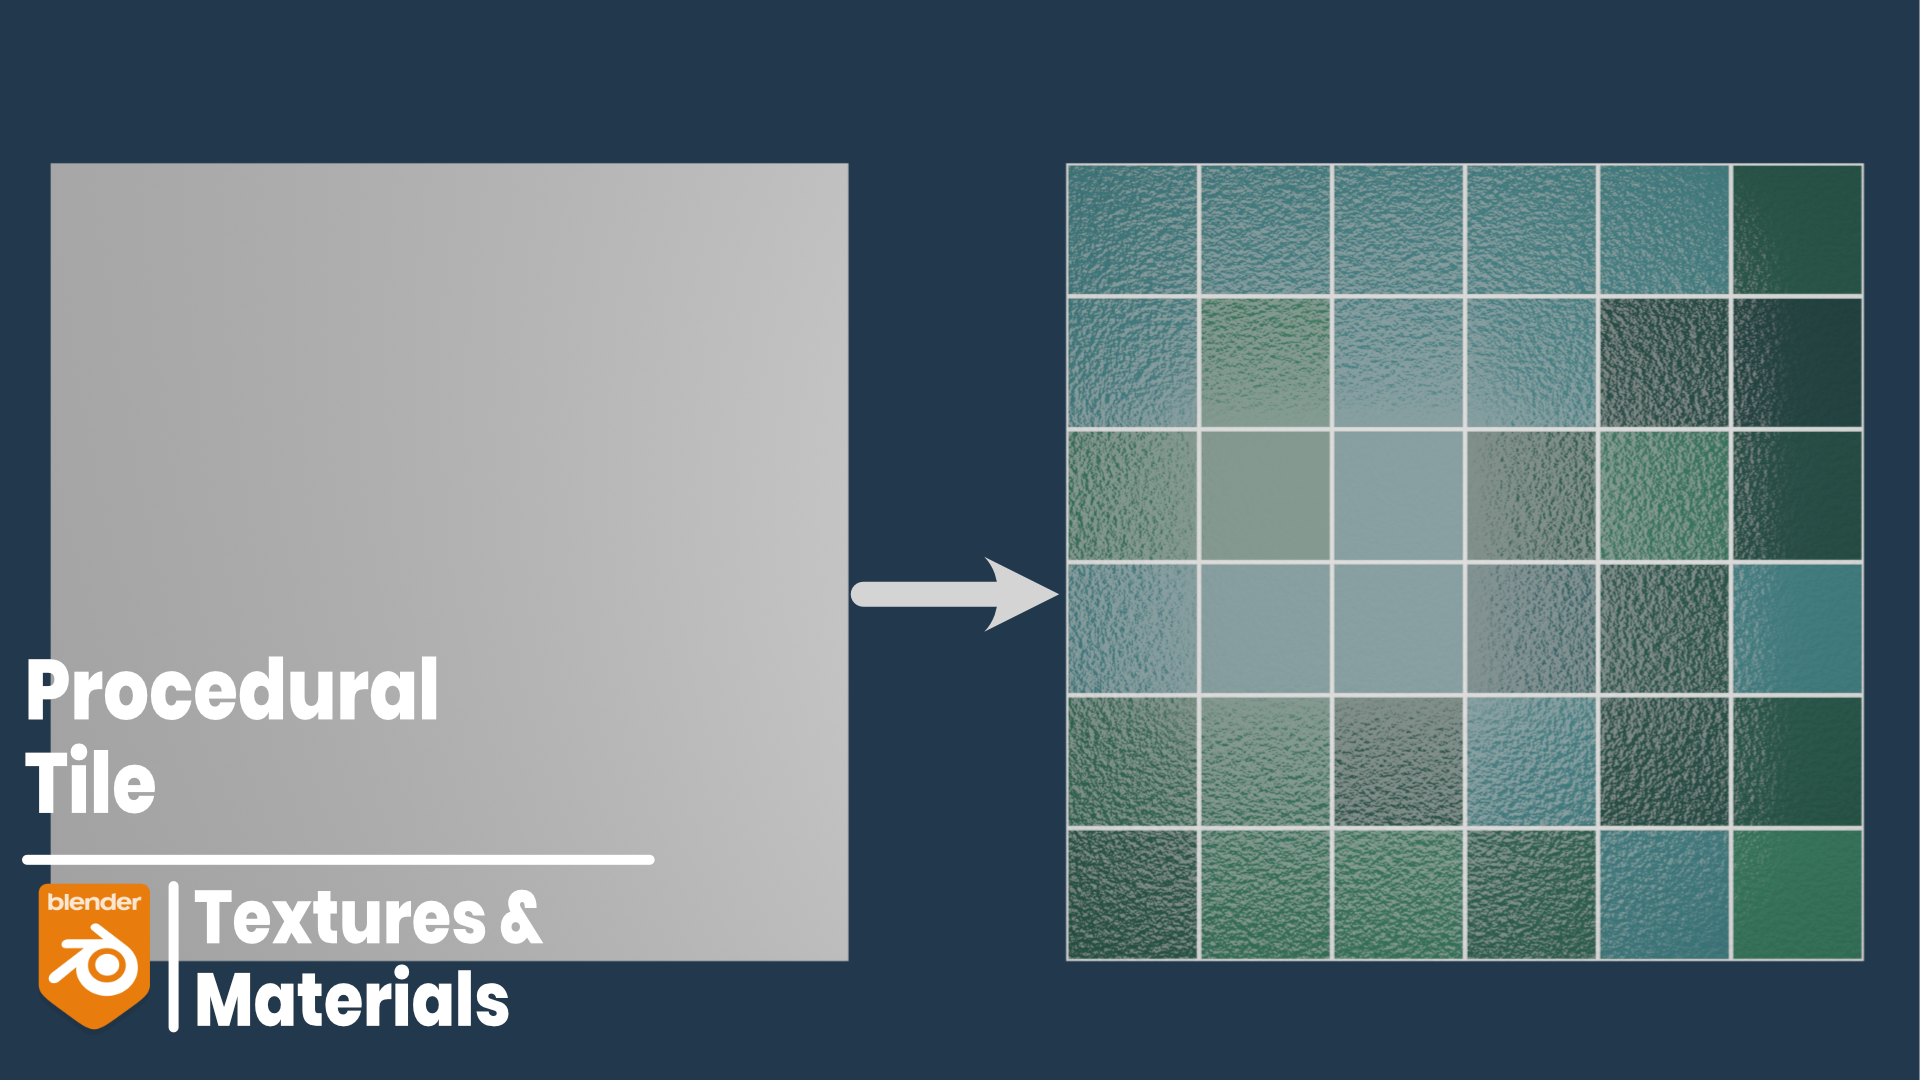
I will change the Color1 to a blue [#65C0C8]
I can now change the rest of the tiles to a green color using the Color2 option [#3C8160]
For the Mortar, I will change the color to a pure white
The Scale allows me to scale the size of the tiles – the larger the number, the smaller the tiles, the smaller the number, that larger the tiles [3]
For the Mortar Size, the smaller the number, the thinner the mortar line [0.01]
Mortar Smoothness determines how sharp and how blurry the Mortar will appear – I will change my Smoothness to 0.5
Bias determines the variation between the two colors – a value of -1 means only Color1 is used and a value of 1 means only Color2 is used
I will use a value of 0.5 to mix the two colors
I can also change the Brick Width and Row Height – I will change the Row Height to 0.5 to make square tiles
Tile Variation
If I want to use more than the two colors for my tiles, I can use SHIFT + A to add a Color Ramp between the Brick Texture and the Principled Shader
I select the Black Color Stop and use the Color Picker to choose Color1
I use the Plus Icon and add a third Color Stop – using the Color Picker to choose Color2
I add a fourth Color Stop and choose a new color [#1A3231]
I can also use the White Color Stop to change the color of the Mortar
All I need to do is move the Color Stops to make changes to the colors of the tiles
To add some texture to the tiles, I use SHIFT + A to add a Noise Texture Node
I also use SHIFT + A to add a Bump Node
I use CTRL + SHIFT + LMB to see the Noise Texture Node on the Plane
I can now change the Scale and Detail of the Noise Texture [150, 5]
I use CTRL + SHIFT + LMB to see the Principled Shader
I connect the Color output of the Noise Texture to the Height of the Bump
I connect the Normal output of the Bump to the Normal of the Principled Shader
I can now change the strength of the Bump Node [0.1]
I can also change the Roughness on the Principled Shader to make the tile more or less shiny